|
| HOUSEKEEPING... |
 System Requirements System Requirements |
- The Tool is built using the FileMaker Pro database software
- For the "Standard Version" of the Cataloging Tool, you need to purchase a copy of the FileMaker application (version 8.5 or greater).
- For "Runtime versions" of the Cataloging Tool, you do NOT need the FileMaker Application; the Runtime versions are self-running (although minus a few features available in the Standard Cataloging Tool).
- The Cataloging Tool runs on both Windows & Macintosh Operating Systems.
|
 Network or Standalone? Network or Standalone? |
- The Standard Version of the Cataloging Tool can be placed on a network and shared across multiple users if you wish (consult your FileMaker documentation for assistance).
- The Tool can be duplicated and separate files can be run on standalone computers, although their data will not be shared.
|
 Standard Version Standard Version |
- The Standard Version of the Cataloging Tool can be downloaded from our Tools web page as a single zipped file.
- Although versions of the Tool will be published as updates are made available, the Cataloging Tool is by default named "PBCore_Catalog.fp7".

- The Standard Version requires the application FileMaker Pro in order to run.
- The Standard Version runs on either Macintosh or Windows operating systems.
|
 Runtime Version for Mac Runtime Version for Mac |
- The Runtime Version for Macintosh can be downloaded from our Tools web page as a single, zipped file.
- The name of the Cataloging Tool Runtime for Mac is "PBCore_Catalog.app"

- The Runtime Version does not require the application FileMaker Pro in order to run; it is a stand-alone application that will launch and run.
- There is a separate Runtime Version for the Windows operating system.
|
 Runtime Version for Windows Runtime Version for Windows |
- The Runtime Version for Windows can be downloaded from our Tools web page as a zipped folder containing 44 different documents, all of which are necessary to run the Tool.
- No matter where you copy the Windows Version of the Runtime Tool, you must copy the entire folder of documents.
- The name of the folder containing all of the 44 supporting documents is "PBCore_Catalog".

- Inside the folder is the actual executable file for the Windows Runtime Version. This is the file you must launch in order to work with the Windows version of the RunTime Catalog Tool. The name of the exectuable is "PBCore_Catalog.exe" .

- The Runtime Version does not require the application FileMaker Pro in order to run; it is a stand-alone application that will launch and run.
- There is a separate Runtime Version for the Macintosh operating system.
|
 Do Not Change the File Name Do Not Change the File Name |
- Keep exactly the same file name for the tool as the file that you download from our site.
- The file extension of .fp7 for the Standard Version opens in FileMaker version 8.5 or greater.
- The file extension of .app for the Macintosh Runtime Version is a self-running application.
- The file extension of .exe for the Windows Runtime Version is a self-running application.
- Do not change the file name of the Cataloging Tool, either Standard or Runtime .
- Do not resave the file with another name.
- Changing the file name will break built-in scripts and cataloging features.
- If you manage to change the file name, the Cataloging Tool will scold you appropriately.
- If you wish to differentiate metadata entries for different collections of media, store new instances of the the PBCore Cataloging Tool within unique folders and directories.
|
 Prep the Tool before Using Prep the Tool before Using |
- To Prep the Tool means to set up "User Accounts" within the tool.
- To Prep the Tool requires you to launch the Tool the first time with an ADMINISTRATOR status.
- As itemized below, the Administrator sets up User Accounts that engage all of the Tool's features
- Once a User Account(s) is created, you can log in as an established user and begin cataloging.
- Both the Standard Version and Runtime Version of the Cataloging Tool must be prepped before actual metadata entry begins.
|
| |
|
| WHAT THE "ADMIN" DOES ON FIRST LAUNCH... |
 Orientation Orientation |
- Launch the Cataloging Tool (either the Standard Version or the Runtime Version).
- A user account login window automatically appears after the Tool is launched.
- On this "First Launch" you must set up one or more User Accounts in the Tool.
- Depending on your computer, your name (or your computer's name) may preemptively appear in the text box for "Account Name". To set up User Accounts, you must enter the Tool as an administrator. Follow these instructions.
- Enter this account name: admin
- On this first launch leave the password blank. You can change that later (highly recommended, by the way).
- Click the OK button.
|
|
- The Tool opens up to a view of the PBCore metadata elements that is called "Asset Summary."
- Two high-level tabs appear. The first is the "Assets Metadata Records" tab that exposes cataloging fields for your use.
- The other major view is called "Actions" and is accessed in order to generate reports, import and export records, and customize picklists of descriptive terms.
|
|
- As the logged-in administrator, you need to create one or more new user accounts.
- As the logged-in administrator, you have amazing powers to manipulate the underpinnings of the Tool. Don't get too curious and adjust the nuts and bolts of the Tool (unless you are adept at using FileMaker).
- Do the following to create a User Account.
- Observe in the upper left corner the widgets that determine which one of four modes is active: Browse, Search, Layout, or Print Preview. Confirm that you are currently in Browse mode.
|
|
- Just below the four mode widgets is a picklist of different views and functions for the Cataloging Tool data.
- Under the word "Layout" click to reveal the picklist selections.
|
|
- From the selection of layouts, notice the checkmark indicating you are currently viewing the layout named "Asset Summary."
- To change the view or layout, select the option named "Users."
- The Tool's screen changes to the layout for User Management that is named "Records of Table Users"
- This layout has numerous functions, as evidenced by the set of 6 gray buttons on the right side of the screen.
|
|
 Create Password for the "admin" Account Create Password for the "admin" Account |
- CREATE A PASSWORD FOR THE ADMIN ACCOUNT...
Since this is the first time that an administrator has launched the PBCore Tool, we advise that you protect your administrative privileges and create a password for the "admin" account.
- Confirm that the user name you are modifying is actually the "admin" user. It will be listed near the center of the screen next to the label "userName."
- From the set of 6 gray buttons, click on the last one labeled "Change Account Password."
|
|
- A "Change Password" dialog window opens for the Account Name "admin".
- Since there is no Old Password, leave that text field blank.
- Create a new password for the "admin" account by entering it twice.
- Click the OK button. Your "admin" account and all of its privileges are now protected from intrusion by other users of the PBCore Cataloging Tool.
|
|
 Create a New User Account(s) Create a New User Account(s) |
- CREATE A NEW USER ACCOUNT...
Your primary task is to create a new user so another individual can use the PBCore Cataloging Tool, but without administrative privileges.
- A nifty button has been created to assist you in creating a new user.
- Locate on the left of the screen the green colored "+ new" button.
- Click the "+ new" button.
|
|
- A dialog window appears asking you to create an Account Name for a new user.
- Type in a name and click the OK button.
|
|
- Be patient. Creation of the account may take up to a minute.
- You may see dialogs flashing by indicating that items (such as picklists) are being copied into the new account.
- Once fully created, confirm that the new account exists by its presence in the top-left of the window.
|
|
- By the way, an administrator can browse through other user names (once created) and modify those accounts. To select a different user, page through the "flip-card" widget in the upper left of the screen until a user's name appears on screen.

|
- A newly created user will need a password. That action does not take place on the layout "Records of Table Users," but is automatically engaged the first time a new user launches and logs into the PBCore Cataloging Tool under their new user account.
- Unless the administrator needs to create additional accounts, the "prep" job is done.
- QUIT FileMaker and the Tool. Be sure you are not just closing the Tool file, but are quitting the entire application.
- The new user now takes control and begins the actual job of entering metadata.
- Relaunch the Tool and log in under the newly created user account.
|
| |
|
| WHAT THE "USER" DOES ON SUBSEQUENT LAUNCH: CREATE PASSWORD... |
- Relaunch the Tool.
- A dialog window will request that the new user enter the new Account Name and Password.
- Again if some other name preemptively appears, delete it and enter the new User Account Name.
- Leave the Password field blank; your user has no password yet.
- Click the OK button.
|
|
- Since this is the first time the new user has logged into the Tool, you are immediately asked to create a new password.
- Leave the "Old Password" text field blank (there is no old password).
- Type in a "New Password" and repeat again in the "Confirm New Password" text field.
- Click OK
|
|
- You are automatically taken to the display and layout "Asset Summary" where you can undertake two main tasks...
... begin to enter and catalog metadata under the tab "Assets Metadata Records" or
... generate reports, modify picklists, or engage imports and exports under the tab "Actions."
- For further instructions, see "Ready to Catalog--Create a New Record" below.
|
| |
|
| ABOUT TOOL BUTTONS... |
- Throughout the PBCore Cataloging Tool you will find ready-made buttons. These buttons command various tasks and contain special scripting in order to enhance functionalies.
- When present, use the ready-made Tool's buttons rather than managing your data entry with standard FileMaker menus and commands. Otherwise, consult the FileMaker HELP to find out how to operate standard FileMaker menus and widgets.
|
 FileMaker's Modes FileMaker's Modes
|
- Filemaker provides four ways in which to manage your database: Browse, Find, Layout, and Preview.
- Switching between modes can be accomplished with widgets in the upper left of the screen.

Use "Browse" mode for data entry and to navigate through a current set of records.

Use "Find" mode to search for records that match criteria you provide.

Use "Layout" mode to create and modify your views into database fields for a FileMaker file. NOTE: This mode is defeated in the PBCore Cataloging Tool when you launch and log into a file with a User Account (the Administrative account has full privileges, however).

Use "Preview" mode to view your current set of records as they will appear in a report and print out. NOTE: Some "summary" functions of FileMaker can only be viewed while in Preview Mode... consult FileMaker Help for a broader discussion.
|
 FileMaker's Record Numbers FileMaker's Record Numbers
|
- One way to step through different records of data in FileMaker is to use the "flip-card" widget in the upper left of the screen.
- Clicking a page in the "flip-card" widget, either "previous" or "next," changes to the data display for a requested record.
- The total number of records in your database, or as the result of a search, are displayed below the widget, along with the actual number of a specific record in the total sequence of records.

|
 Ready-made Tool Buttons -- Links to PBCore Dictionary Ready-made Tool Buttons -- Links to PBCore Dictionary
|
- It is easy to forget what the definitions and guidelines are for PBCore's metadata elements.
- To ensure you are using a PBCore element correctly, there are direct links from the Cataloging Tool to the PBCore User Guide on the Internet.
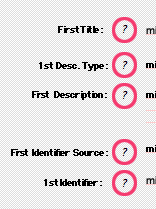
- Use a "?" button next to an element's name to open the specific User Guide definition page for that element. You must be connected to the Internet to access the PBCore User Guide from the Cataloging Tool.
- In the User Guide, you can refresh your memory about PBCore best practices in using its metadata elements.
|
 Ready-made Tool Buttons -- Add or Delete Entire Records Ready-made Tool Buttons -- Add or Delete Entire Records
|
- The PBCore Cataloging Tool provides several custom buttons with embedded scripts and functionalities. Use these if they are present.
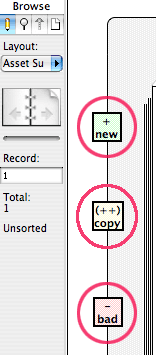
- Use the "+ New" button to create a brand new record for a new asset that you are describing and cataloging.
- Use the "- Bad" button to delete an entire record of descriptions for an asset.
- Use the "++ Copy" button to duplicate the record on which you are working. After clicking the button, the duplicated record is presented to you, where you can make alterations in any metadata field. This feature is useful when (for example) all the intellectual content descriptors are the same, but only the formats or property rights data changes.
|
 Ready-made Tool Buttons -- Add or Delete Repeated Entries Ready-made Tool Buttons -- Add or Delete Repeated Entries
|
- Many of the PBCore metadata elements allow you to "repeat" an entry option. Sometimes there is more than one type of description for an asset, for example, there may be multiple titles for a media item, each being of a different type or kind of title (see the PBCore elements title and titleType).
- The Cataloging Tool offers you a quick and easy way to add a "repeated value" for a metadata element and its companion elements if they are part of a PBCore "Container."
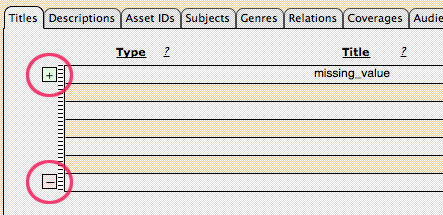
- Use the "+" button to add a repeated value.
- Use the "-" button to remove a repeated value.
|
| |
|
| READY TO CATALOG -- CUSTOMIZE YOUR PICKLISTS... |
- Many of PBCore's metadata elements provide recommended, pre-defined picklists of terms (vocabularies) to select from while you describe a media item.
- The PBCore project worked diligently to craft meaningful and comprehensive picklists, but obviously we could not account for every use case.
- Consequently, the PBCore Cataloging Tool offers you the ability to customize the PBCore picklists...
...
alter the terms in the "global authority lists" used in PBCore (requires administrator privileges)
... narrow the terms you see when selecting from a picklist in order to be exposed to
the most commonly used ones for your cataloging needs. This is a "cherry-picking" function. Nifty.
- As a logged in User under a specific account, you can view what values are used by other Users.
- Each User is only able to modify his or her own picklist selections, however.
|
 How to Modify Picklists How to Modify Picklists
|
- If you wish to customize or modify your picklists, confirm that you are located in the view "Asset Summary".
- If you are not in that view, locate the "Layout" picklist widget in the upper left and select the first layout option called "Asset Summary."
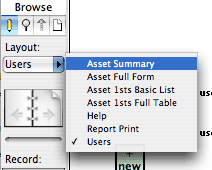
- Once located in the view "Asset Summary," you will recognize that there are two high-level tabs in that layout:
...
"Assets Metadata Records" for entering descriptions
... "Actions" for generating reports, importing & exporting records, and customizing picklists.

- Click on the tab "Actions."
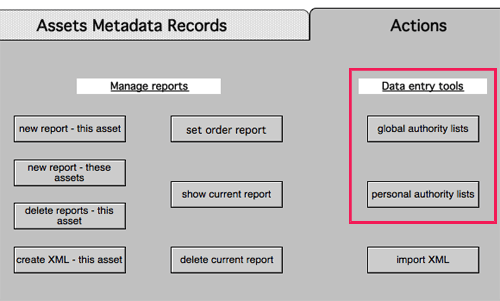
- The display changes to a batch of actionable items, grouped under two headings...
... "Manage Reports"
... "Data Entry Tools"
- We will concentrate on the Data Entry Tools group.
|
 Global Authority Lists (requires administrator privileges) Global Authority Lists (requires administrator privileges)
|
- The option to modify the PBCore "Global Authority Lists" allows you to modify the actual, standardized, existing terms used in PBCore picklists.
- Only the "admin" account has the privileges to alter the pre-existing terms found in PBCore picklists.
- If an administrator modifies the terms, these modifications are seen by all users.
- From the "Actions" layout, click the button "Global Authority Lists"
- 22 PBCore metadata fields use picklists. Select one of those fields from the list of fields.
|
|
- Once a metadata field is selected, a screen is presented containing a list of all the standardized terms available in PBCore for that particular picklist.
|
|
- Highlight a term from the listings on the right under the heading "View[name of field]" and change it as needed.
- In order to "register" your action, click your mouse/cursor anywhere outside of the highlighted term. Using the TAB key from your keyboard also will move the cursor outside of the highlighted term and register your action.
- To exit or change screens, use the Layout selection options in the upper left, next to the cue words "Change Views."
|
 Personal Authority Lists (for an individual user) Personal Authority Lists (for an individual user)
|
- The option to modify the PBCore "Personal Authority Lists" allows you to cherry pick which picklist terms from the standardized PBCore lists are presented to you when cataloging a media item. Some picklists are rather lengthy, so being able to cull only those terms you most often use is beneficial...
...
Terms can be removed.
...
Terms can be added.
...
Pre-existing terms provided by the PBCore cannot be modified.
- Any User account has the privilege to cherry pick terms for use in his or her cataloging tasks.
- From the "Actions" layout, click the button "Personal Authority Lists"
|
|
- 22 PBCore metadata fields use picklists. Select one of those fields from the list of fields.
|
|
- Once a metadata field is selected, then a screen is presented containing a list of the pre-existing, standardized terms available from PBCore for that specific picklist.
- In addition to the terms, definitions and other usage guidelines are included on the screen.
|
|
- TO DELETE A TERM...
Along the left and right edges of the text field for a term are light gray patterns. If you click the pattern, the term is highlighted.
- Click the reddish "-" button and the highlighted term is removed from your personalized picklist.
- In order to "register" your action, click your mouse/cursor anywhere outside of the highlighted term. Using the TAB key from your keyboard also will move the cursor outside of the highlighted term and register your action.
- Confirm the term's removal by clicking on the phrase "Click to display actual list." The newly modified list presents itself.
|
- TO ADD A TERM...
Click the greenish "+" button and a new empty text field is made available.
- Type in your new customized term. The text color is a light gray.
- In order to "register" your action, click your mouse/cursor anywhere outside of the new term. Using the TAB key from your keyboard also will move the cursor outside of the highlighted term and register your action.
- Confirm the term's addition to the list by clicking on the phrase "Click to display actual list." The newly modified list presents itself.
|
- TO MODIFY A TERM...
Sorry. You cannot modify an existing term when logged into the Tool under a specific User Account. Modifying terms can only be undertaken by an administrator, using the "admin" login, employing the option to modify "Global Authority Lists."
|
- TO RESET TERMS TO THE PRE-EXISTING PBCORE DEFAULTS...
YIKES! You would prefer to restore the default list of terms to the ones provided by the pre-existing, standardized descriptors found in PBCore. Not a problem.
- Click the greenish "+ALL" button in order to re-activate and re-install the original terms from PBCore for the metadata field you are manipulating.
|
| |
|
| READY TO CATALOG -- CREATE A NEW RECORD... |
- To create a new record and begin cataloging, you start in the screen or layout named "Asset Summary."
- If you are not in that view, locate the "Layout" picklist widget in the upper left and select the first layout option called "Asset Summary."

- In the Layout "Asset Summary" there are two main, high-level tabs.
- Click on the tab "Assets Metadata Records."

- Once located in the view "Assets Metadata Records," you must first create a NEW RECORD in the Tool's database in order to actually enter terms and values.
- Confirm that as a new user who has launched the Tool for the first time there are zero records in the database. On the left side of the screen under the word "Record" you should see a "0".
|
|
- Locate and click the green "+ new" button.
- A new record is created.
- The "Record Number Indicator" on the left will increment from the original "0" to "1".
|
|
| |
|
| READY TO CATALOG -- ENTER METADATA DESCRIPTIONS... |
- You are now ready to begin cataloging a media item by selecting from the three major tabs along the top of the window:
- Required Metadata (descriptions that PBCore deems absolutely necessary)
- Enhanced Metadata (descriptions that PBCore deems optional, but recommended)
- Extended Metadata (custom metadata elements you append to PBCore)
- Under each of these three major tabs are sub-tabs and other metadata selections to be made. Each will be discussed shortly.
- NOTE: If the tool offers a ready-made button to accomplish a task, use that button rather than standard FileMaker menu items. The Tool's buttons contain special scripting in order to enhance functionalities.
|
|
 Required Metadata Entries Required Metadata Entries |
-
To begin cataloging, start by entered PBCore required metadata.
- Do not be tempted to skip over the required metadata. Tool functionality depends greatly on this data being complete. Sharing data with other PBCore users also depends greatly on the required metadata.
- Click the tab labeled "Required Metadata."
- Notice that there are two sub-tabs...
... Content
... Instantiation
- Under each of these sub-tabs are actual PBCore metadata fields ready for your data entry.
|
|
- Observe that in the white colored area near the bottom of the screen are data fields that auto-fill based on the actual PBCore metadata you enter under the metadata tabs and sub-tabs.
- This area is a "Status Block" designed to help you keep track of what media item you are cataloging as you move deeper and deeper into the other metadata tabs and data fields.
- The "Status Block" appears on every page of the Tool.
- Without the "Status Block" it would be easy to get confused, especially if you are describing multiple media items in multiple records in the Tool.
|
- To ensure you are using a PBCore element correctly, there are direct links from the Cataloging Tool to the PBCore User Guide on the Internet.

- Use a "?" button next to an element's name to open the specific User Guide definition page for that element. You must be connected to the Internet to access the PBCore User Guide from the Cataloging Tool.
- In the User Guide, you can refresh your memory about PBCore best practices in using its metadata elements.
|
- As you encounter new metadata fields, notice that the fields are pre-filled with the phrase "missing value." This information prompts you to enter data.
- Click in a field with the phrase "missing value." It is highlighted.
- Enter your cataloging description or data according to the best practice for that metadata element.
- Use the mouse or the keyboard's Tab or Shift+Tab to jump to next or previous metadata fields.
|
 Enhanced Metadata Entries Enhanced Metadata Entries |
- You should be in the Tool layout called "Asset Summary."

- You should be using the tab labeled "Assets Metadata Records."

- To continue cataloging, you should activate the sub-tab labeled "Enhanced Metadata."
- Enhanced metadata is highly recommended, but not required in order to complete a PBCore record.
- Click the tab labeled "Enhanced Metadata."
- After clicking the tab labeled "Enhanced Metadata," notice that there are three sub-tabs...
... Content
... Intellectual Property
... Instantiation
- Under each of these three sub-tabs are subordinate tabs that divide up the many PBCore metadata elements into manageable chunks.
|
|
- Many of the PBCore metadata elements allow you to "repeat" an entry option. Sometimes there is more than one type of description for an asset, for example, there may be multiple titles for a media item, each being of a different type or kind of title (see the PBCore elements title and titleType).
- The Cataloging Tool offers you a quick and easy way to add a "repeated value" for a metadata element and its companion elements if they are part of a PBCore "Container."

- Use the "+" button to add a repeated value.
- Use the "-" button to remove a repeated value.
|
 Extended Metadata Entries Extended Metadata Entries |
- You should be in the Tool layout called "Asset Summary."

- You should be using the tab labeled "Assets Metadata Records."

- To continue cataloging, you should activate the sub-tab labeled "Extended Metadata."
- Extended Metadata represents metadata elements you wish to add to the core set of elements found in PBCore.
- Click the tab labeled "Extended Metadata."
- Because we do not know the nature of the customized elements you want to add to PBCore, we cannot anticipate the types of data entry you require. Consequently, you will need to customize the Cataloging Tool to accommodate your new elements.
- You should consult with someone familiar with FileMaker in order to extend the functionality of the PBCore Cataloging Tool.
|
|
| |
|
| ACTIONS -- REPORTS & PRINT-OUTS... |
- If you wish to generate reports for metadata records and print them out, the Cataloging Tool provides several report management functions.
- Start by entering the layout labeled "Asset Summary".
- If you are not in that view, locate the "Layout" picklist widget in the upper left and select the first layout option called "Asset Summary."

- Once located in the view "Asset Summary," you will recognize that there are two high-level tabs in that layout:
...
"Assets Metadata Records" for entering descriptions
... "Actions" for generating reports, importing & exporting records, and customizing picklists.

- Click on the tab "Actions."
- The display changes to a batch of actionable items, grouped under two headings...
... "Manage Reports"
... "Data Entry Tools"
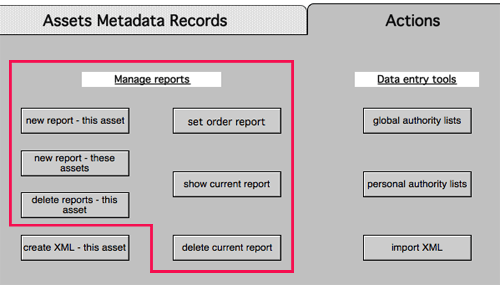
- We will concentrate on the Manage Reports group.
|
- Simple reports can be generated for any current set of assets on a session basis and stored in the Tool's database for future reference.
- Six report options are available...
... New Report-This Asset
Generates a report for viewing and printing of a single record and asset currently active in the Cataloging Tool. Uses the Tool layout named Report Print in the FileMaker mode Preview.
... New Report-These Assets
Generates a report for viewing and printing for a batch of records and assets as a result of a cataloging session or a search. Uses the Tool layout named Report Print in the FileMaker mode Preview.
...
Delete Reports-This Asset
Purges the reports generated for an asset. The actual metadata remains intact.
... Show Current Report
Displays for viewing and printing report that is resident in the Tool. Uses the Tool layout named Report Print in the FileMaker mode Preview.
... Delete Current Report
Purges the report that is resident in the Tool.
The actual metadata remains intact.
... Set Order Report
Configure the order in which PBCore metadata appears in your final report
|
- For any report generated for viewing and printing, the Tool automatically switches to the layout named Report Print in the FileMaker mode Preview.
- When FileMaker is in the mode Preview, you get a WYSIWYG, or What You See is What You Get view of how a report will actually print out.
- When FileMaker is in the mode Preview, any buttons located in the data entry areas are inactive. If after printing, you attempt to switch to the layout named "Asset Summary" there will be a warning message directing you to switch from Preview mode to Browse mode before continuing to work with the Tool.

|
- To switch from Preview mode to Browse mode, use the mode widgets located in the upper left of the screen.
 ---> ---> 
|
| |
|
| ACTIONS -- EXPORTING DATA AS XML (according to PBCore XSD)... |
- If you wish to export metadata, the Cataloging Tool will auto-generate an XML-based file according to the structure and framework as defined by the PBCore XSD (XML Schema Definition).
- Start by entering the layout labeled "Asset Summary".
- If you are not in that view, locate the "Layout" picklist widget in the upper left and select the first layout option called "Asset Summary."

- Once located in the view "Asset Summary," you will recognize that there are two high-level tabs in that layout:
...
"Assets Metadata Records" for entering descriptions
... "Actions" for generating reports, importing & exporting records, and customizing picklists.

- Click on the tab "Actions."
- The display changes to a batch of actionable items, grouped under two headings...
... "Manage Reports"
... "Data Entry Tools"
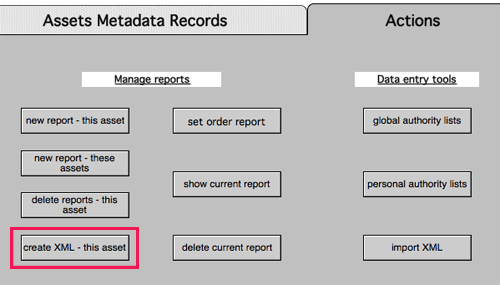
- We will concentrate on the Manage Reports group, specifically the XML export option.
|
- The button labeled "Create XML-This Asset" will auto-generate an XML-based file for the metadata of a single record for the asset that is current in the Cataloging Tool.
- At the present time, the Cataloging Tool does not generate an XML file containing metadata for multiple data records.
- The XML file that is created is based on the definition and framework of the PBCore XSD or XML Schema Definition.
- This XML file can be shared with other information systems that can accommodate the import of PBCore XSD formatted files.
- NOTE: The XML export function requires your computer to be connected to the Internet. Helper files are located on the PBCore website that are necessary to structure the XML document properly.
- When you activate the XML creation button, FileMaker will ask you to designate where the file will be saved.
- You must also specify the type of export you want. FileMaker will offer you a picklist of over half-a-dozen options. Select the XML file format.
- You must also give your exported file a name. The file extension of ".xml" will automatically be added to your document's name.
|
|
- The entire XML export function is automatic. No real intervention or actions are required on your part.
|
| |
|
| ACTIONS -- IMPORTING XML DATA (according to the PBCore XSD)... |
- If you wish to import metadata, the Cataloging Tool will populate a record in the Cataloging tool from an external, pre-existing data file, if that file is constructed according to the structure and framework as defined by the PBCore XSD (XML Schema Definition).
- Start by entering the layout labeled "Asset Summary".
- If you are not in that view, locate the "Layout" picklist widget in the upper left and select the first layout option called "Asset Summary."

- Once located in the view "Asset Summary," you will recognize that there are two high-level tabs in that layout:
...
"Assets Metadata Records" for entering descriptions
... "Actions" for generating reports, importing & exporting records, and customizing picklists.

- Click on the tab "Actions."
- The display changes to a batch of actionable items, grouped under two headings...
... "Manage Reports"
... "Data Entry Tools"
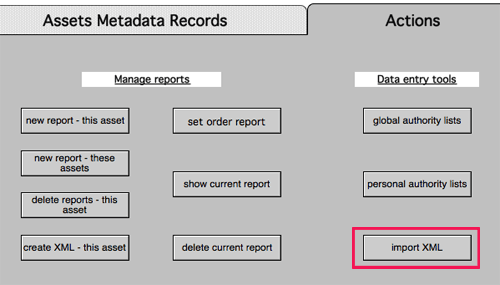
- We will concentrate on the Data Entry Tools group.
|
- The button labeled "Import XML " will import into the Cataloging Tool an XML document that conforms to the PBCore XSD or XML Schema Definition.
- NOTE: The XML import function requires your computer to be connected to the Internet. Helper files are located on the PBCore website that are necessary to parse the external XML document properly and populate the correct data fields in the Cataloging Tool.
- When you activate the XML import button, a secondary screen is displayed with three critical actions you must take.
|
|
- STEP 1...
... Select, Control-Click, or Right-Mouse-Click
the box with the icon labeled "Untitled.tab." As a result, a picklist of FileMaker options appears.
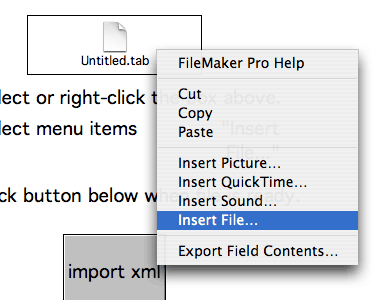
- STEP 2...
... Select the option "Insert File" from the picklist. A dialog window opens asking you to navigate to the directory in which the external XML file resides. Select that file and click the OPEN button.
- STEP 3...
... After telling FileMaker where the XML file resides, click the on-screen button labeled "Import XML." The Cataloging Tool accesses helper files from the PBCore website and imports the data, parsing its components into the correct metadata fields in the Tool. If there are any parsing errors, the Tool instantly reports which metadata element is at fault. Basically, any errors that are reported indicate that the external XML file you are importing is faulty and does not conform to the structure and framework of the PBCore XSD.
|
- After an external XML document is imported into the Cataloging Tool, you can manipulate that data using the regular functions found in the Tool.
|
| |
|
| THE TOOL AUTO-SAVES... |
- FileMaker databases automatically save your work as you go.
- There is no need to manually save your cataloging work as you enter descriptions and terms.
|
| |
|
| LEAVING AND RETURNING TO THE TOOL |
- When you wish to stop cataloging, simply quit the Tool/FileMaker App.
- All data is auto-saved.
- Later, when returning to the Tool, use the same instructions for launching the Tool for a specific User Account.
|
|


